https://github.com/alreadytakenjonas/plotneuralnet
Latex code for making neural networks diagrams
Science Score: 23.0%
This score indicates how likely this project is to be science-related based on various indicators:
-
○CITATION.cff file
-
○codemeta.json file
-
○.zenodo.json file
-
✓DOI references
Found 3 DOI reference(s) in README -
✓Academic publication links
Links to: zenodo.org -
○Academic email domains
-
○Institutional organization owner
-
○JOSS paper metadata
-
○Scientific vocabulary similarity
Low similarity (9.7%) to scientific vocabulary
Last synced: 9 months ago
·
JSON representation
Repository
Latex code for making neural networks diagrams
Basic Info
- Host: GitHub
- Owner: AlreadyTakenJonas
- License: mit
- Default Branch: master
- Size: 2.26 MB
Statistics
- Stars: 1
- Watchers: 1
- Forks: 0
- Open Issues: 0
- Releases: 0
Fork of HarisIqbal88/PlotNeuralNet
Created over 3 years ago
· Last pushed over 3 years ago
https://github.com/AlreadyTakenJonas/PlotNeuralNet/blob/master/
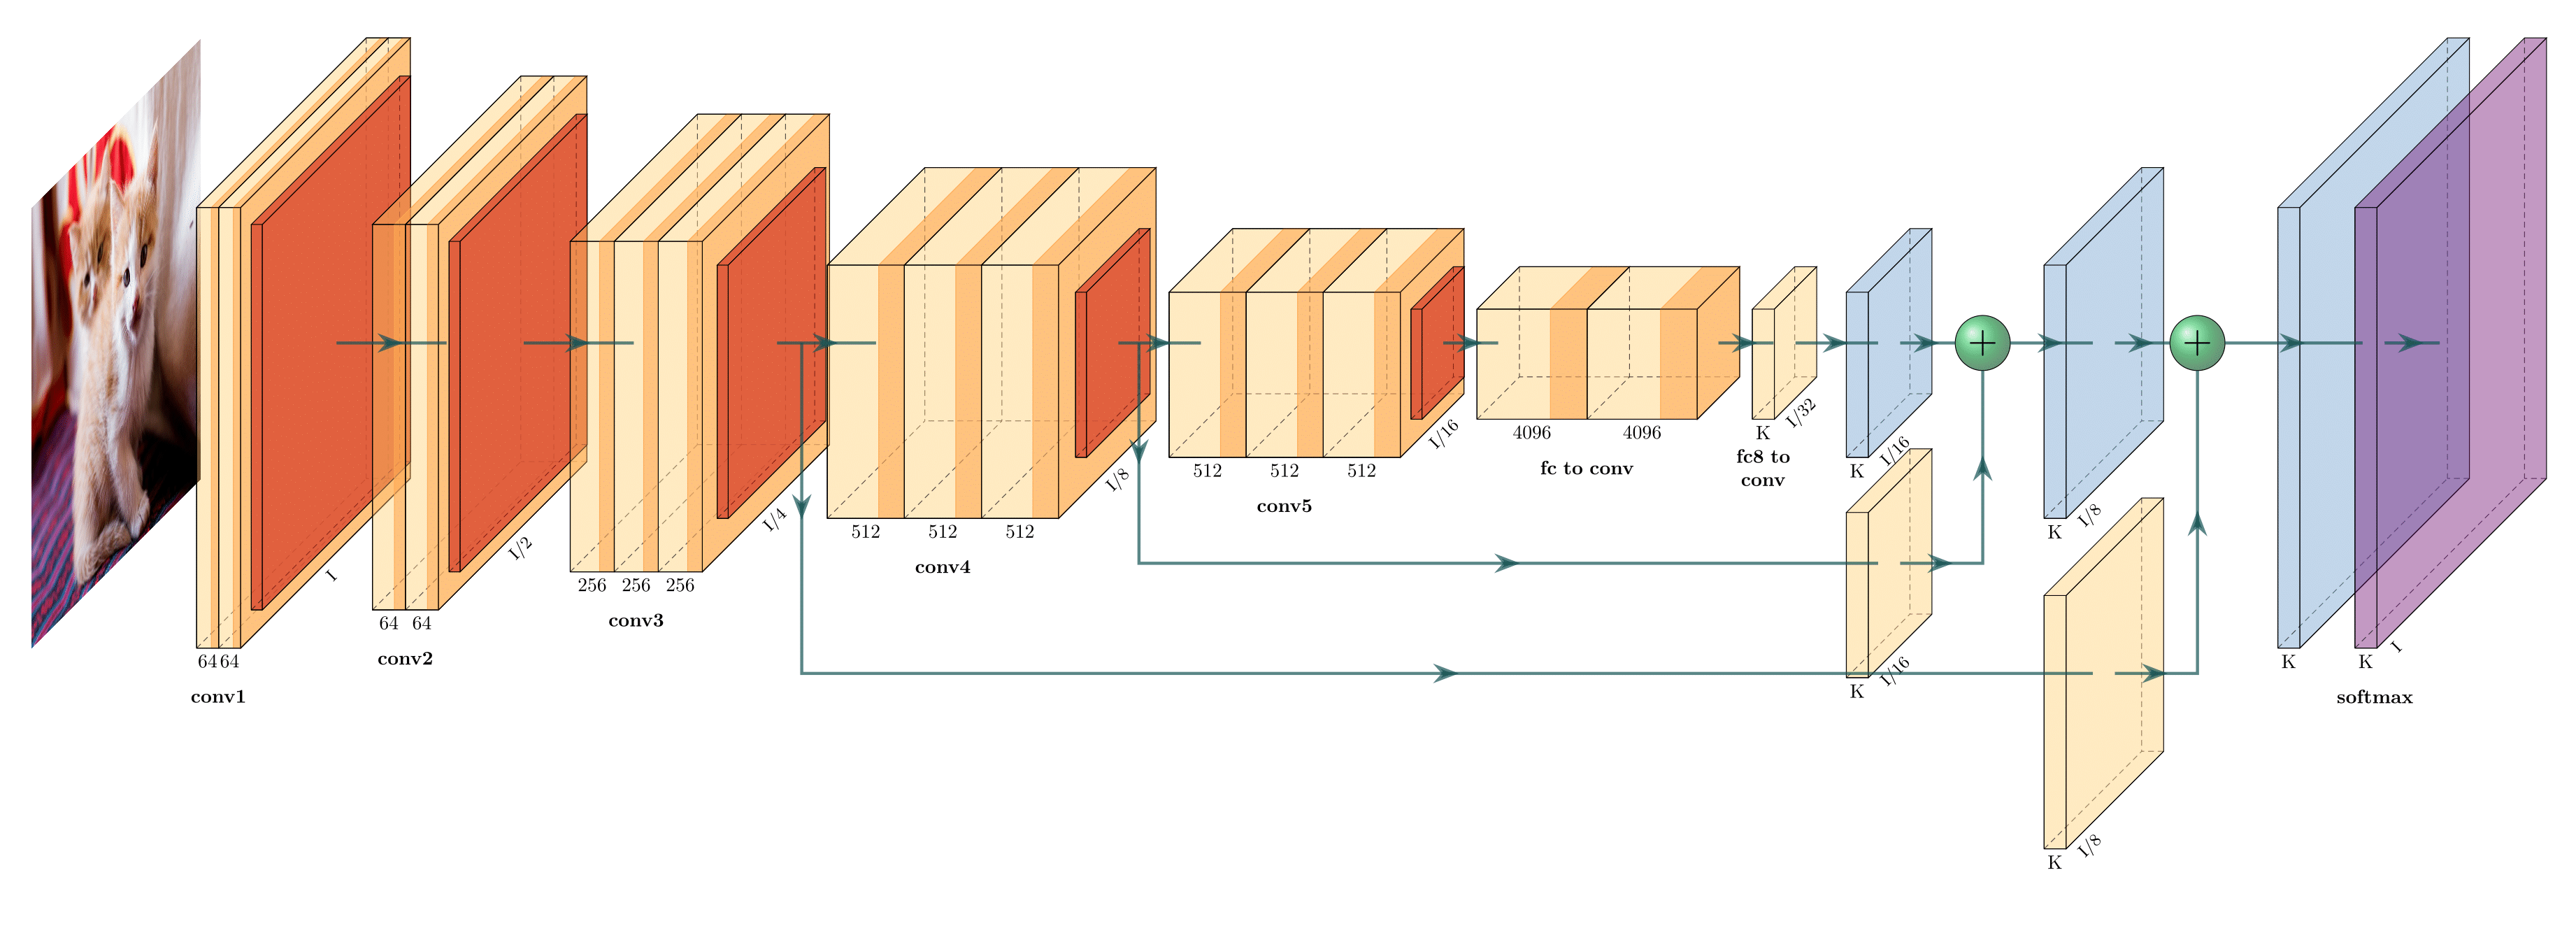
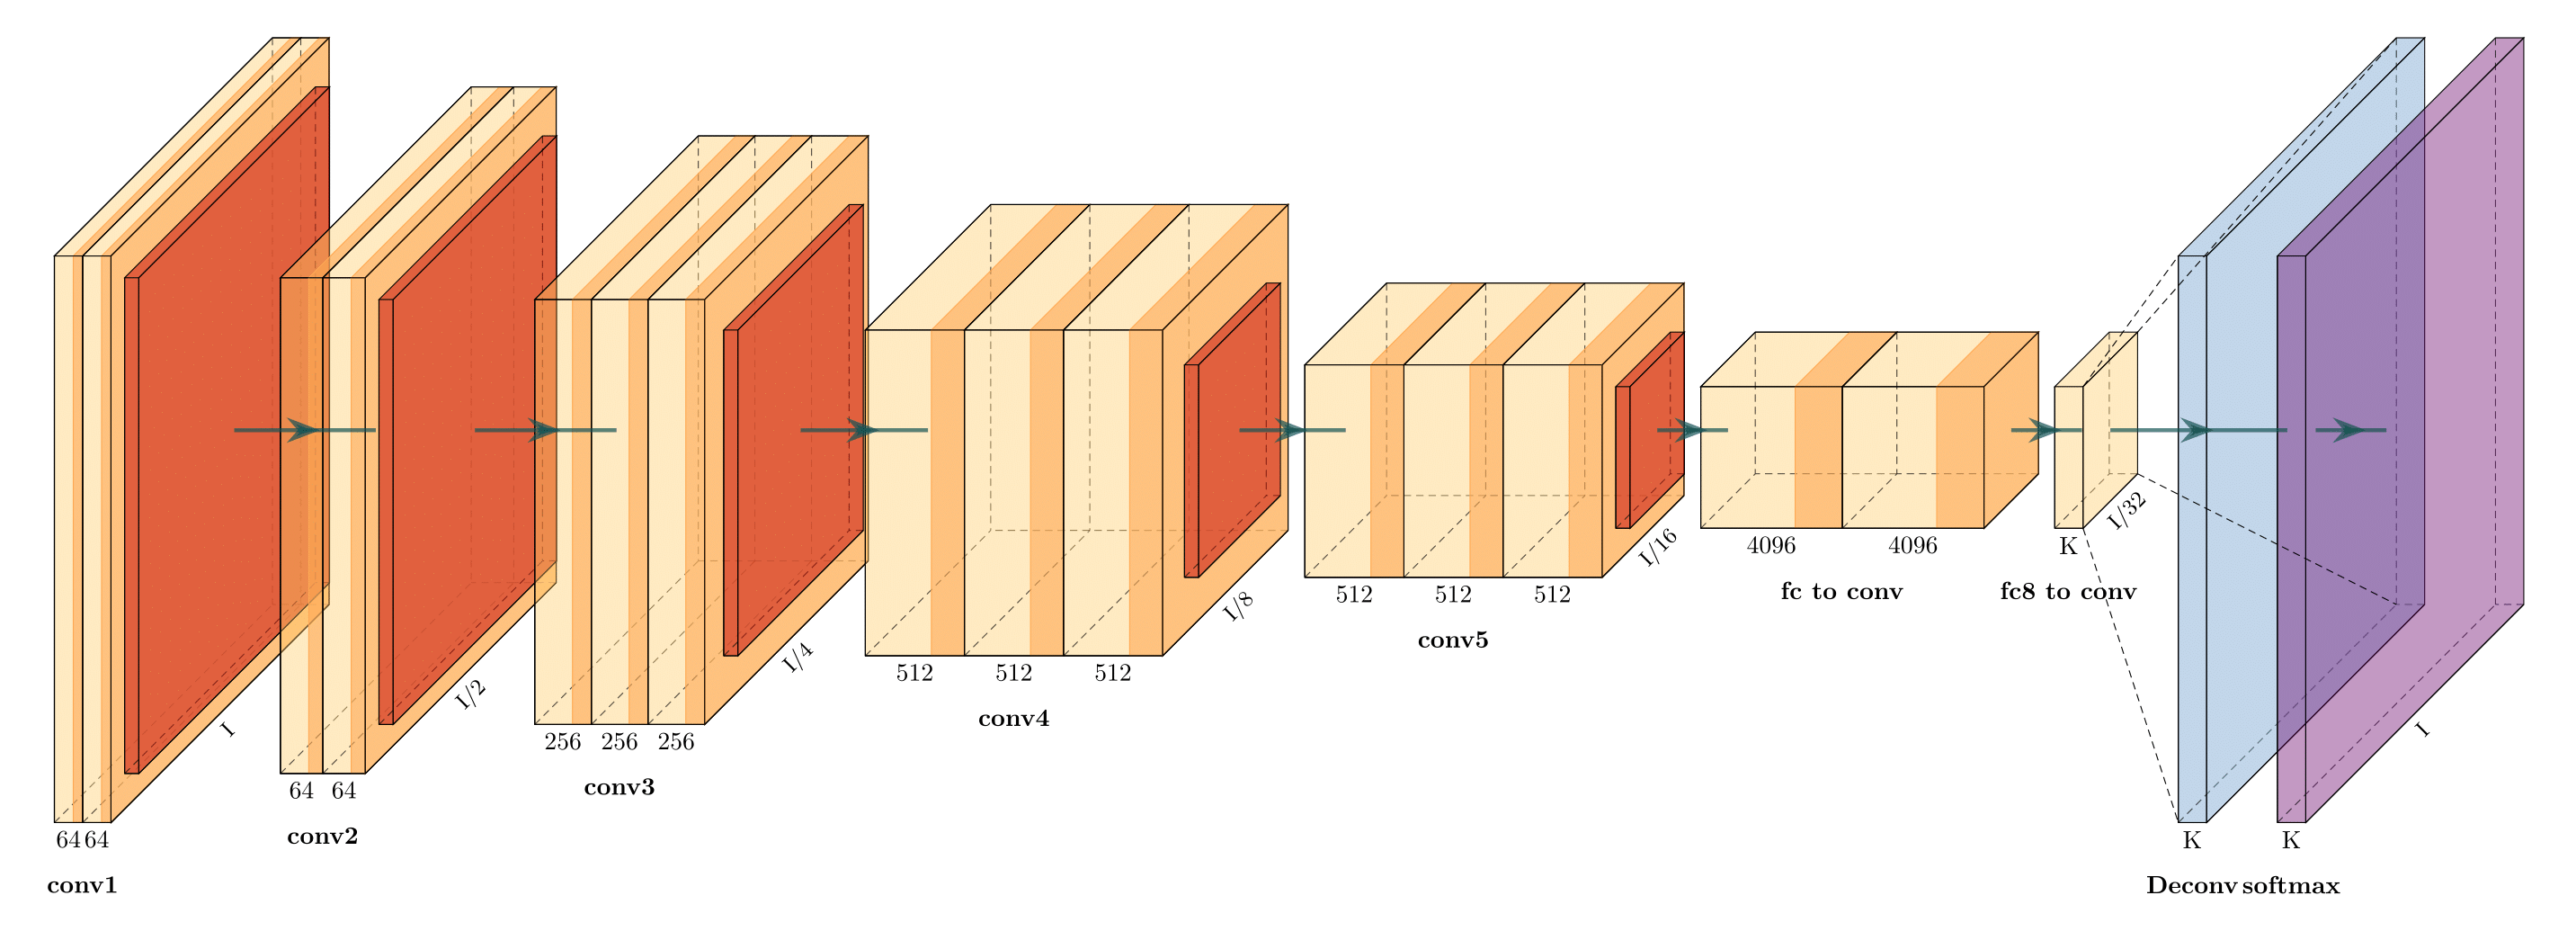
# PlotNeuralNet [](https://doi.org/10.5281/zenodo.2526396) Latex code for drawing neural networks for reports and presentation. Have a look into examples to see how they are made. Additionally, lets consolidate any improvements that you make and fix any bugs to help more people with this code. ## Examples Following are some network representations:
FCN-8 (view on Overleaf)
FCN-32 (view on Overleaf)
Holistically-Nested Edge Detection (view on Overleaf)
## Getting Started 1. Install the following packages on Ubuntu. * Ubuntu 16.04 ``` sudo apt-get install texlive-latex-extra ``` * Ubuntu 18.04.2 Base on this [website](https://gist.github.com/rain1024/98dd5e2c6c8c28f9ea9d), please install the following packages. ``` sudo apt-get install texlive-latex-base sudo apt-get install texlive-fonts-recommended sudo apt-get install texlive-fonts-extra sudo apt-get install texlive-latex-extra ``` * Windows 1. Download and install [MikTeX](https://miktex.org/download). 2. Download and install bash runner on Windows, recommends [Git bash](https://git-scm.com/download/win) or Cygwin(https://www.cygwin.com/) 2. Execute the example as followed. ``` cd pyexamples/ bash ../tikzmake.sh test_simple ``` ## TODO - [X] Python interface - [ ] Add easy legend functionality - [ ] Add more layer shapes like TruncatedPyramid, 2DSheet etc - [ ] Add examples for RNN and likes. ## Latex usage See [`examples`](examples) directory for usage. ## Python usage First, create a new directory and a new Python file: $ mkdir my_project $ cd my_project vim my_arch.py Add the following code to your new file: ```python import sys sys.path.append('../') from pycore.tikzeng import * # defined your arch arch = [ to_head( '..' ), to_cor(), to_begin(), to_Conv("conv1", 512, 64, offset="(0,0,0)", to="(0,0,0)", height=64, depth=64, width=2 ), to_Pool("pool1", offset="(0,0,0)", to="(conv1-east)"), to_Conv("conv2", 128, 64, offset="(1,0,0)", to="(pool1-east)", height=32, depth=32, width=2 ), to_connection( "pool1", "conv2"), to_Pool("pool2", offset="(0,0,0)", to="(conv2-east)", height=28, depth=28, width=1), to_SoftMax("soft1", 10 ,"(3,0,0)", "(pool1-east)", caption="SOFT" ), to_connection("pool2", "soft1"), to_end() ] def main(): namefile = str(sys.argv[0]).split('.')[0] to_generate(arch, namefile + '.tex' ) if __name__ == '__main__': main() ``` Now, run the program as follows: bash ../tikzmake.sh my_arch

Owner
- Login: AlreadyTakenJonas
- Kind: user
- Repositories: 3
- Profile: https://github.com/AlreadyTakenJonas
Jonas Eichhorn