https://github.com/ansj11/bts
From Big to Small: Multi-Scale Local Planar Guidance for Monocular Depth Estimation
Science Score: 10.0%
This score indicates how likely this project is to be science-related based on various indicators:
-
○CITATION.cff file
-
○codemeta.json file
-
○.zenodo.json file
-
○DOI references
-
✓Academic publication links
Links to: arxiv.org -
○Academic email domains
-
○Institutional organization owner
-
○JOSS paper metadata
-
○Scientific vocabulary similarity
Low similarity (9.9%) to scientific vocabulary
Last synced: 10 months ago
·
JSON representation
Repository
From Big to Small: Multi-Scale Local Planar Guidance for Monocular Depth Estimation
Basic Info
- Host: GitHub
- Owner: ansj11
- License: gpl-3.0
- Language: Python
- Default Branch: master
- Size: 543 KB
Statistics
- Stars: 0
- Watchers: 0
- Forks: 0
- Open Issues: 0
- Releases: 0
Fork of cleinc/bts
Created almost 7 years ago
· Last pushed almost 7 years ago
https://github.com/ansj11/bts/blob/master/
# BTS From Big to Small: Multi-Scale Local Planar Guidance for Monocular Depth Estimation [arXiv](https://arxiv.org/abs/1907.10326) ## Video Demo [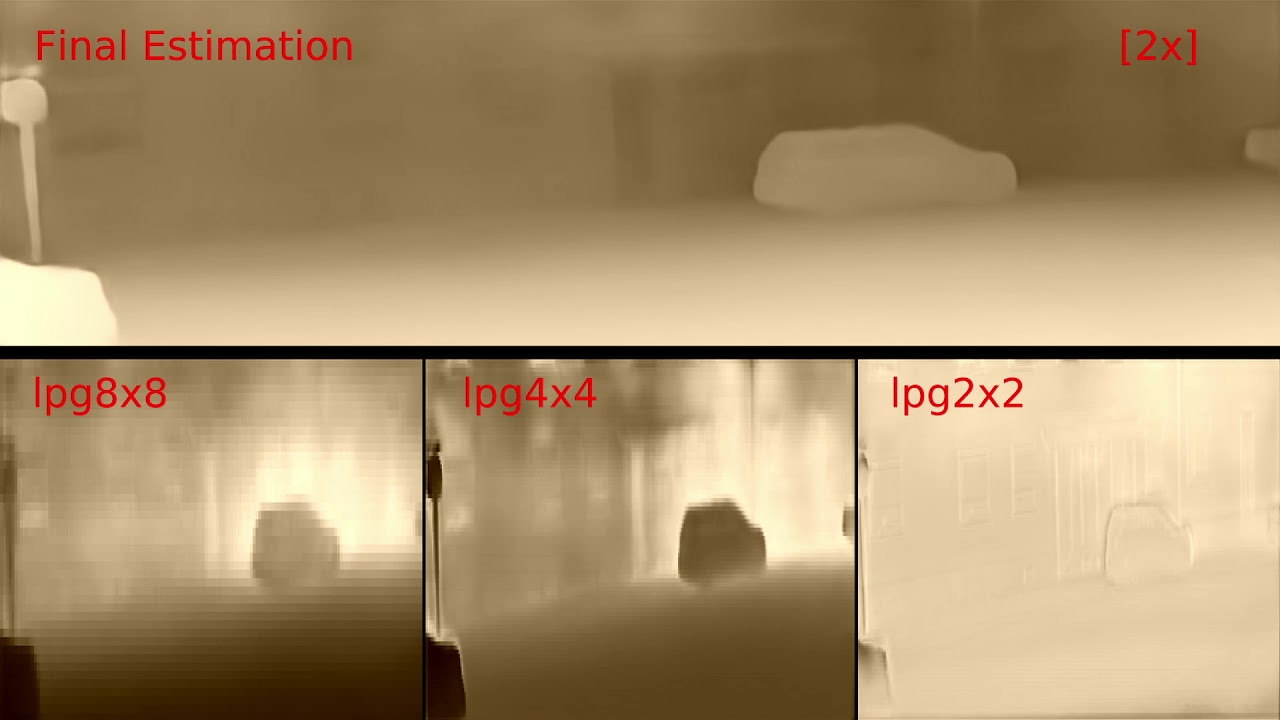](https://www.youtube.com/watch?v=2fPdZYzx9Cg) [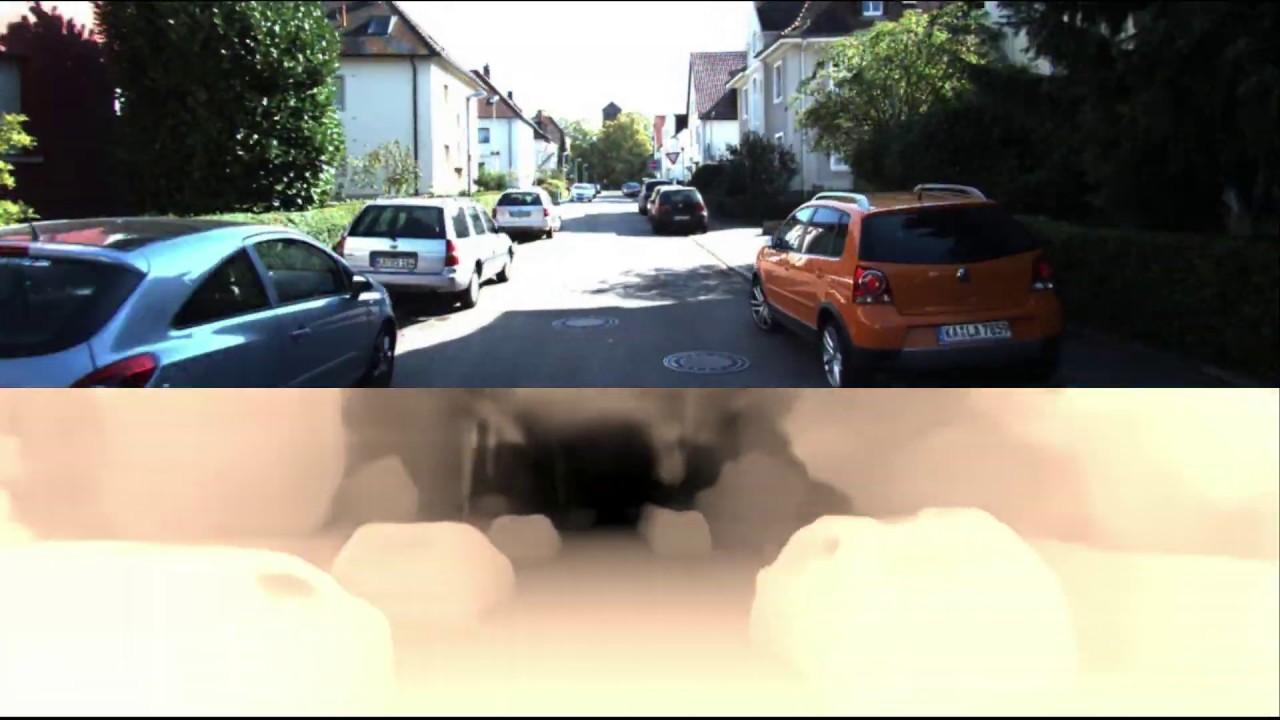](https://www.youtube.com/watch?v=1J-GSb0fROw) ## Note This repository contains a Tensorflow implementation of BTS.\ We tested this code under Tensorflow 1.14, CUDA 10.0 on Ubuntu 18.04. ## Preparation ```shell $ cd ~ $ mkdir workspace $ cd workspace $ git clone https://github.com/cogaplex-bts/bts $ cd bts/custom_layer $ mkdir build && cd build $ cmake -D CUDA_TOOLKIT_ROOT_DIR=/usr/local/cuda .. $ make -j ``` If you encounter an error "fatal error: third_party/gpus/cuda/include/cuda_fp16.h: No such file or directory", open "tensorflow/include/tensorflow/core/util/gpu_kernel_helper.h" and edit a line from ``` #include "third_party/gpus/cuda/include/cuda_fp16.h" ``` to ``` #include "cuda_fp16.h" ``` Also, you will need to edit lines in "tensorflow/include/tensorflow/core/util/gpu_device_functions.h" from ``` #include "third_party/gpus/cuda/include/cuComplex.h" #include "third_party/gpus/cuda/include/cuda.h" ``` to ``` #include "cuComplex.h" #include "cuda.h" ``` If you are testing with Tensorflow version lower than 1.14, please edit a line in "compute_depth.cu" from ``` #include "tensorflow/include/tensorflow/core/util/gpu_kernel_helper.h" ``` to ``` #include "tensorflow/include/tensorflow/core/util/cuda_kernel_helper.h" ``` Then issue the make commands again. ```shell $ cmake .. $ make -j ``` ## Testing with [NYU Depth V2](https://cs.nyu.edu/~silberman/datasets/nyu_depth_v2.html) ```shell $ cd ~/workspace/bts/utils # Get official NYU Depth V2 split file $ wget http://horatio.cs.nyu.edu/mit/silberman/nyu_depth_v2/nyu_depth_v2_labeled.mat # Convert mat file to image files $ python extract_official_train_test_set_from_mat.py nyu_depth_v2_labeled.mat splits.mat ../../dataset/nyu_depth_v2/official_splits/ $ cd .. $ mkdir models # Get BTS model trained with NYU Depth V2 $ python utils/download_from_gdrive.py 1ipme-fkV4pIx87sOs31R9CD_Qg-85__h models/bts_nyu.zip $ cd models $ unzip bts_nyu.zip ``` Once the preparation steps completed, you can test BTS using following commands. ``` $ cd ~/workspace/bts $ python bts_test.py arguments_test_nyu.txt ``` This will save results to ./result_bts_nyu. ## Evaluation Following command will evaluate the prediction results for NYU Depvh V2. ``` $ python eval_with_pngs.py --pred_path ./result_bts_nyu/raw/ --gt_path ../dataset/nyu_depth_v2/official_splits/test/ --dataset nyu --min_depth_eval 1e-3 --max_depth_eval 10 --eigen_crop ``` ## Preparation for Training ### NYU Depvh V2 First, you need to download DenseNet-161 model pretrained with ImageNet. ``` # Get DenseNet-161 model pretrained with ImageNet $ cd ~/workspace/bts $ python utils/download_from_gdrive.py 1rn7xBF5eSISFKL2bIa8o3d8dNnsrlWfJ models/densenet161_imagenet.zip $ cd models && unzip densenet161_imagenet.zip ``` Then, download the dataset. ``` $ cd ~/workspace/dataset/nyu_depth_v2 $ mkdir raw && cd raw $ aria2c -x 16 -i ../../bts/utils/nyudepthv2_archives_to_download.txt $ parallel unzip ::: *.zip $ cd ~/workspace/bts/utils $ wget http://cs.nyu.edu/~silberman/code/toolbox_nyu_depth_v2.zip $ unzip toolbox_nyu_depth_v2.zip $ cd toolbox_nyu_depth_v2 $ mv ../sync_project_frames_multi_threads.m . $ mv ../train_scenes.txt . ``` Run script sync_project_frames_multi_threads.m using MATLAB to get synchronized RGB and depth images. Once the dataset is ready, you can train the network using following command. ``` $ cd ~/workspace/bts $ python bts_main.py arguments_train_nyu.txt ``` You can see the progress of the training via ``` $ tensorboard --logdir ./models/bts_nyu_test/ ``` and open localhost:6006 with your favorite browser. ### KITTI You can also train with KITTI dataset with following procedures. First, download the ground truth depthmaps from [KITTI](http://www.cvlibs.net/download.php?file=data_depth_annotated.zip). Then, download and unzip the raw dataset using following commands. ``` $ cd ~/workspace/dataset $ mkdir kitti_dataset && cd kitti_dataset $ mv ~/Downloads/data_depth_annotated.zip . $ unzip data_depth_annotated.zip $ aria2c -x 16 -i ../../bts/utils/kitti_archives_to_download.txt $ parallel unzip ::: *.zip ``` Finally, we can train our network with ``` $ cd ~/workspace/bts $ python bts_main.py arguments_train_eigen.txt ``` ## Testing and Evaluation with [KITTI](http://www.cvlibs.net/datasets/kitti/eval_depth.php?benchmark=depth_prediction) Once you have KITTI dataset and official ground truth depthmaps, you can test and evaluate our model with following commands. ``` # Get KITTI model trained with KITTI Eigen split $ cd ~/workspace/bts $ python utils/download_from_gdrive.py 1w4WbSQxui8GTDEsjX5xb4m7_-5yCznhQ models/bts_eigen.zip $ cd models && unzip bts_eigen.zip ``` Test and save results. ``` $ cd ~/workspace/bts $ python bts_test.py arguments_test_eigen.txt ``` This will save results to ./result_bts_eigen Finally, we can evaluate the prediction results with ``` $ python eval_with_pngs.py --pred_path ./result_bts_eigen/raw/ --gt_path ../dataset/kitti_dataset/data_depth_annotated/ --dataset kitti --min_depth_eval 1e-3 --max_depth_eval 80 --do_kb_crop --garg_crop ``` ## License Copyright (C) 2019 Jin Han Lee, Myung-Kyu Han, Dong Wook Ko and Il Hong Suh \ This Software is licensed under GPL-3.0-or-later.
Owner
- Name: ShowMeCode
- Login: ansj11
- Kind: user
- Repositories: 2
- Profile: https://github.com/ansj11