https://github.com/cy2016-1/arduino-is-followed-by-a-four-axis-mechanical-arm.
https://github.com/cy2016-1/arduino-is-followed-by-a-four-axis-mechanical-arm.
Science Score: 13.0%
This score indicates how likely this project is to be science-related based on various indicators:
-
○CITATION.cff file
-
✓codemeta.json file
Found codemeta.json file -
○.zenodo.json file
-
○DOI references
-
○Academic publication links
-
○Academic email domains
-
○Institutional organization owner
-
○JOSS paper metadata
-
○Scientific vocabulary similarity
Low similarity (0.6%) to scientific vocabulary
Last synced: 9 months ago
·
JSON representation
Repository
Basic Info
- Host: GitHub
- Owner: cy2016-1
- Language: C++
- Default Branch: master
- Size: 0 Bytes
Statistics
- Stars: 0
- Watchers: 1
- Forks: 0
- Open Issues: 0
- Releases: 0
Created about 2 years ago
· Last pushed about 2 years ago
Metadata Files
Readme
README.md
Arduino is followed by a four-axis mechanical arm
Arduino随动四轴机械臂,机械臂实现步骤记录、复现功能
制作这个机械臂是机器人课程老师留下的作业,任务要求是夹取印章,然后在指定的地方盖章。程序要求能记录步骤,并且复现出来。
先大概看下丑陋的成品:
 说实话确实很丑,因为临近毕业了,事情又多,没时间搞那么好看了
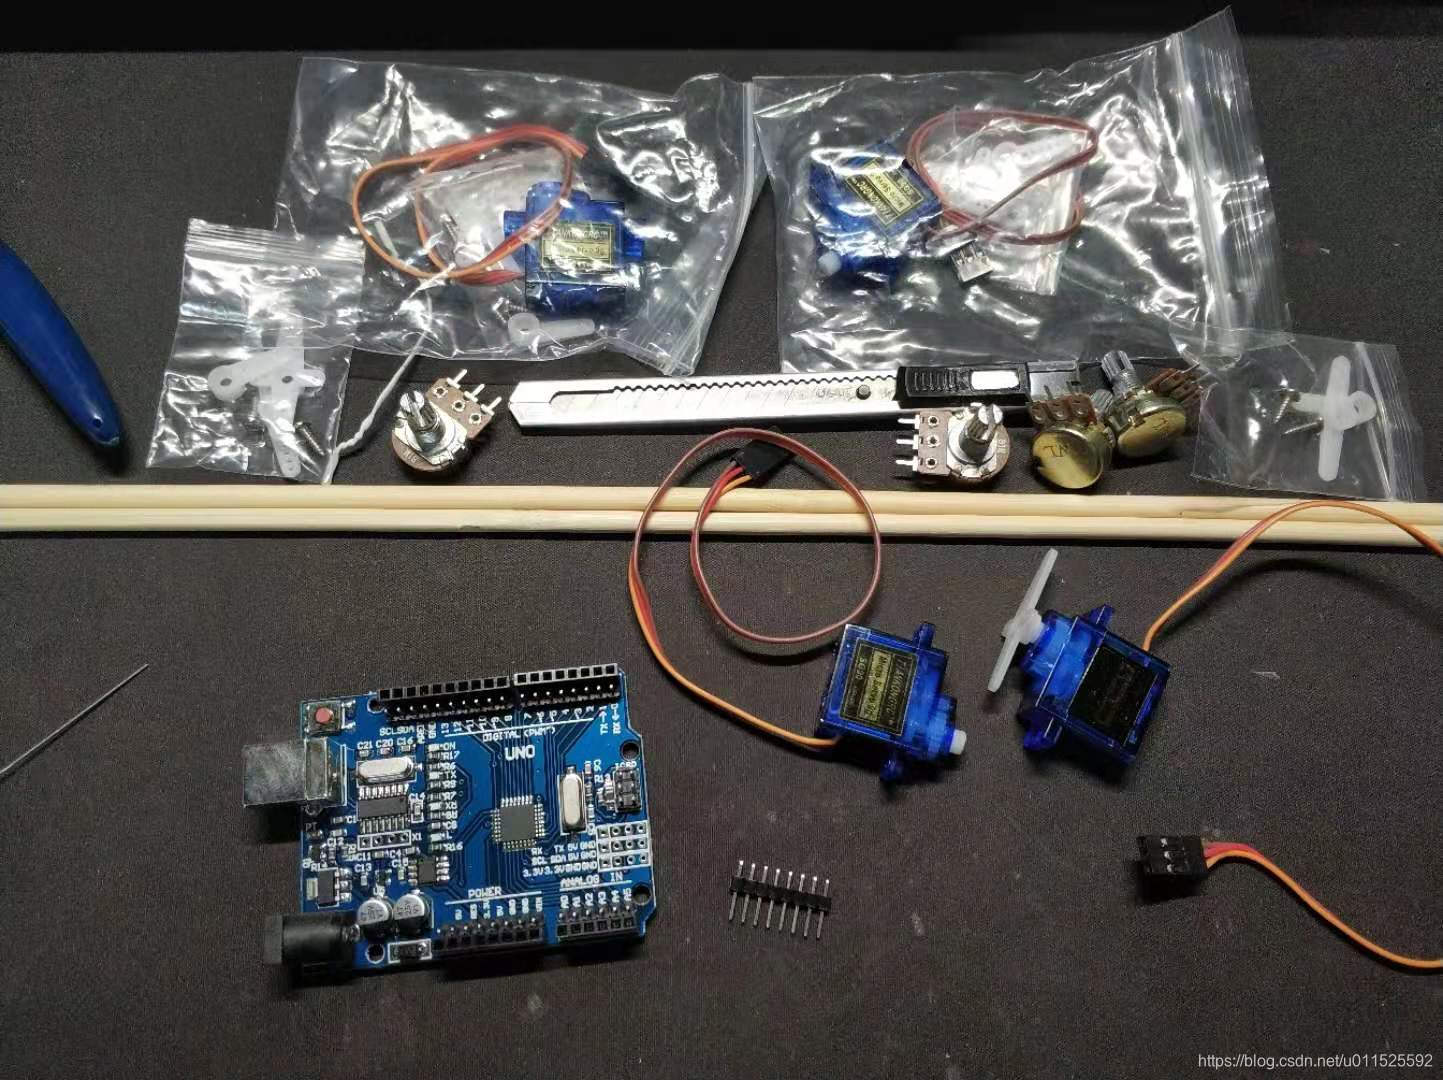
原材料: 电位器 * 4 9g舵机 * 4 轻触开关 * 1 Arduin UNO * 1 热熔胶 杜邦线多根(建议用质量好的杜邦线) 连接用的木棍(可以用其他代替)
然后用热熔胶连接成下图的样子:
 这样就可以做成随动机械臂了,但是后来因为用电烙铁把电位器管脚连接起来后接触不良,原因是电烙铁的温度使电位器的连接处发生变形,导致的接触不良。随后就拆掉了,也没心思搞了,最后就变成一开始的样子了。
电路连接图如下:
 最终的成品:
 老师布置的任务要求是夹取印章,然后在指定的地方盖章。程序要求能记录步骤,并且复现出来。
为了节约成本,我只用了一个按键 按键功能:(按几次板子上的灯也相应的会闪烁几次,长按会快速闪烁4次) 按1次:按顺序记录步骤n; 按2次:复现(把刚刚记录的步骤重复一遍); 按3次:暂未定义; 长按1秒:清除记录的所有步骤。
我自己写的代码请下载:Robot_ Source_Program
Owner
- Name: wza.github.io
- Login: cy2016-1
- Kind: user
- Website: cl.github.io
- Repositories: 1
- Profile: https://github.com/cy2016-1